
This is a tutorial on how you can make washitape* at home! It's easy, fun and pretty inexpensive. Anyone can do it, I promise!
 Washitape has been gaining popularity recently and if you're at all interested in crafting, scrapbooking, snailmailing or any other paper-related activity, you've most likely heard of it. I, too, really like working with it and have accumulated a few (dozen) rolls of it. This is pretty clear if you look at my Snailmail posts on this blog...
The tricky thing about the tape is that it can be pretty expensive.There's a bazillion different prints, but picking only one can be tough. Pick a couple and you're all of a sudden racking up quite the bill. On top of that, despite those bazillion prints, sometimes I have this awesome paper that I wish was tape because I have this project that could totally use it... I can't be alone with these thoughts!
So, I wanted to share how I make my own tape at home!
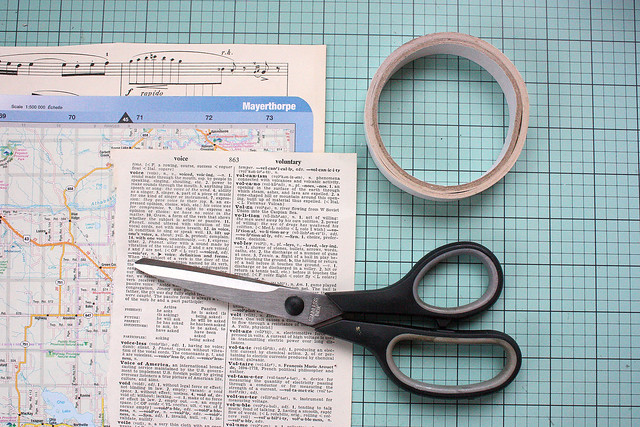
You'll need:
- Double-sided tape
- Scissors
- Paper of your own choosing (almost anything works; magazines, wrapping paper, etc. etc.)
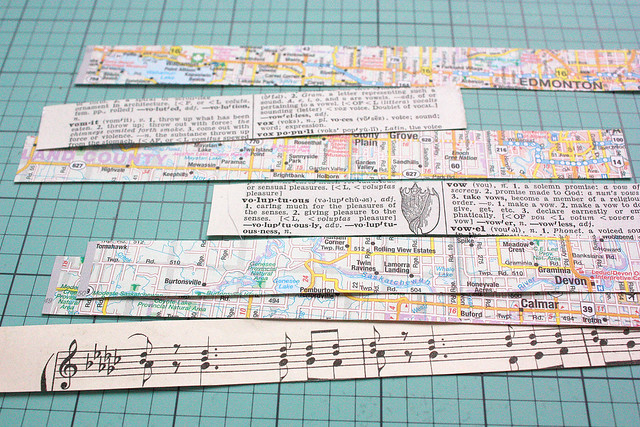
I'm using vintage paper; I picked a music sheet, a map and a page from an old dictionary.

Pick the parts of the pattern you want on your tape and start sticking the tape on the opposite side. Run your finger over the tape to make sure it sticks properly.
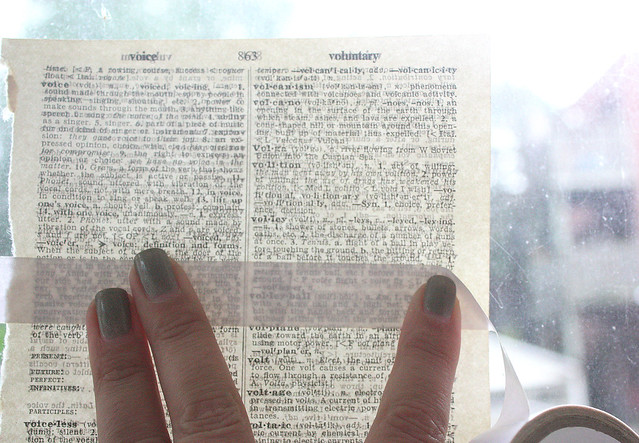 If you're using thin paper, like the dictionary page I used, you can place the sheet against a window to see exactly where to place the tape. I wanted the illustration of the shell to show on my tape.
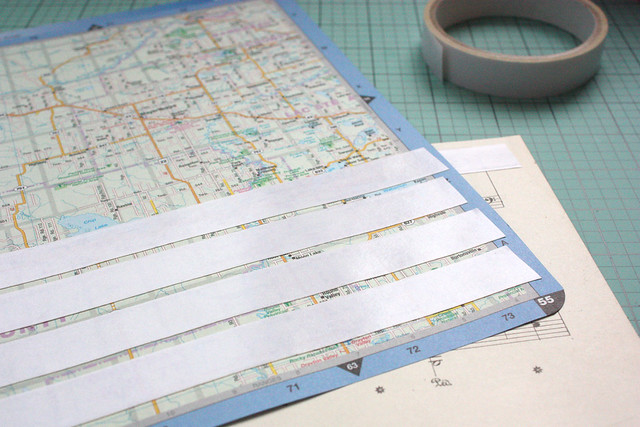 On some materials the placement doesn't really matter, like on the map. It'll look cool, no matter which part is showing. You can just stick several pieces of tape on it and they'll look really fun once they're finished.
 Once you've laid down the tape, start cutting the strips out. Cut the lengths first and then trim the ends if needed.
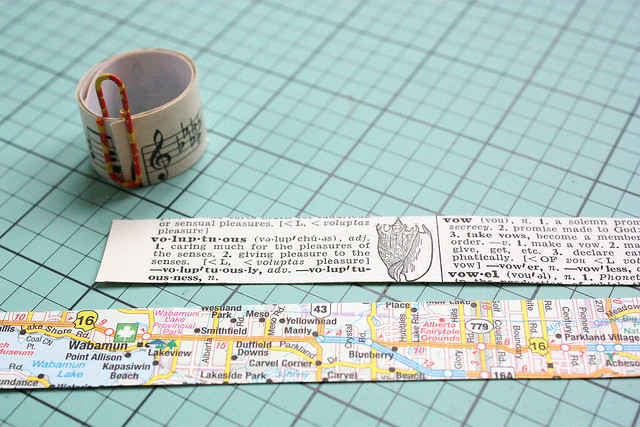
Woohoo! You're done! Off to crafting!
You can use this for most projects you'd use regular washi tape. I find there's two major differences though, 1) the DIY version is not repositionable (unless you use repositionable double-sided tape, which apparently exists. I Googled it.) and 2) this is harder to tear, so you might want to cut it instead of tearing it to size.
You can use this for most projects you'd use regular washi tape. I find there's two major differences though, 1) the DIY version is not repositionable (unless you use repositionable double-sided tape, which apparently exists. I Googled it.) and 2) this is harder to tear, so you might want to cut it instead of tearing it to size.
*) Please note that I use the term "washi tape" loosely. Technically washi tape is made from Japanese Washi paper. So, I guess the more accurate term is paper tape. I'm using the term "washi tape", since that is the common term used to refer to this type of a crafting material.
P.S. Learn from my mistakes: If you use a dictionary page like I did, actually check which word you're using, don't just slap the tape on any word...
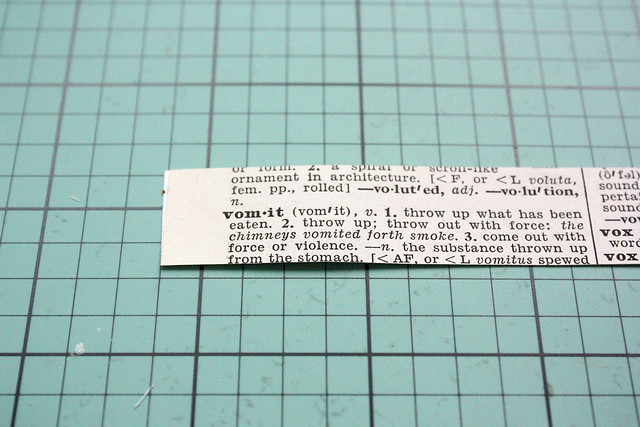
Haha, vomit tape.
ReplyDeleteYeah... Craftfail :) It was pretty funny. Looks like it's definitely good for a laugh!
DeleteThanks for the tutorial. I also like the vomit tape... :D
ReplyDeleteYou're very welcome! I'm glad you like the vomit tape :D Maybe it'll be a 'thing' soon!
DeleteNo hyva kun sait uuden idean! Tulee mullekin tosi hyva fiilis kun naista on jollekin hyotya :)
ReplyDeleteVomit tape :D Hei kiitos tästä(kin) ideasta. Pitänee testata.. kun mulla on aikaa! Tosin näyttää siltä, että tärisevät kädet on aika big no no hehe
ReplyDeleteCool
ReplyDelete