
Since I already saw the Halloween sign, it's time to get a move on with the preparations!
I've been busy dying paper for some brand new tutorials and assembling some really nifty Halloween goodies for a giveaway! I'm also experimenting with some Halloween mail, which, of course, has put me in the snailmailing mood!
Over the last year or so, the readership of this blog has been steadily increasing, so I wanted to share a few improved tutorials from the Brinner past...It's time to fix some past wrongs that have been bugging me!
First up:
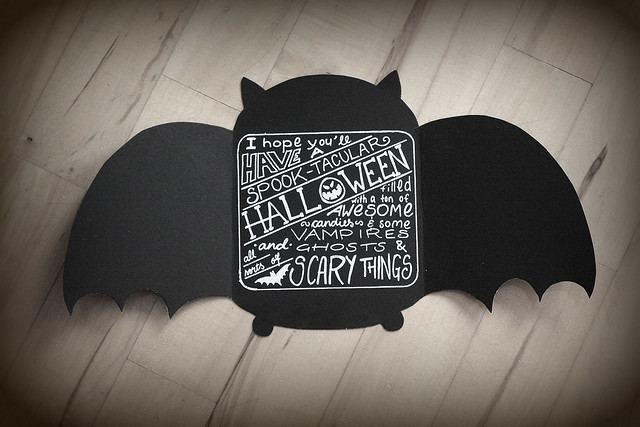
...Halloween bat cards!
I still love these! One of my all-time favorite Brinner tutorials!
This was the first one that was pinned multiple times on Pinterest and I actually got some feedback on. It was the one that kind of proved I was on the right track.
It was, however, way too complicated. I tracked my own process step-by-step but it didn't really translate into simple instructions. Now I feel like I am much better at this, so I re-wrote (and photographed) a new, much simpler way to make these!
(If you want to see the original CLICK HERE)
 You'll need
- Pen or pencil
- Scissors
- Ruler
- Two rectangle or square shaped items, one a bit smaller than the other. I used two postcards, but anything in that shape works, books, coasters, notepads, etc.
- Cardboard. I used a cereal box, like I often do. Any sturdier paper/cardboard works.
The above are for a template (you know how I like those, right?)
For the cards you'll also need
- Black card or paper (I used poster board which is a really nice, sturdy cardboard. Also, very cheap!)
- White (or other light/bright colored) pen (I like using a gel pen for this)
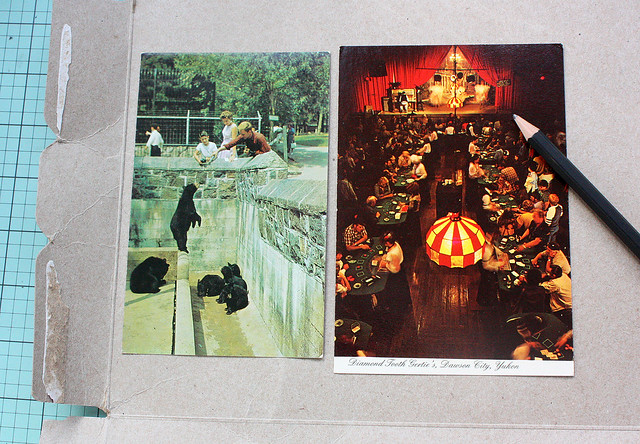 Start by placing the larger rectangle in the middle of your cardboard, leaving enough space on both sides to fit the smaller rectangle.
Trace the large rectangle in the middle and the smaller one on both sides. Make sure the larger and the smaller rectangles are connected from one side.
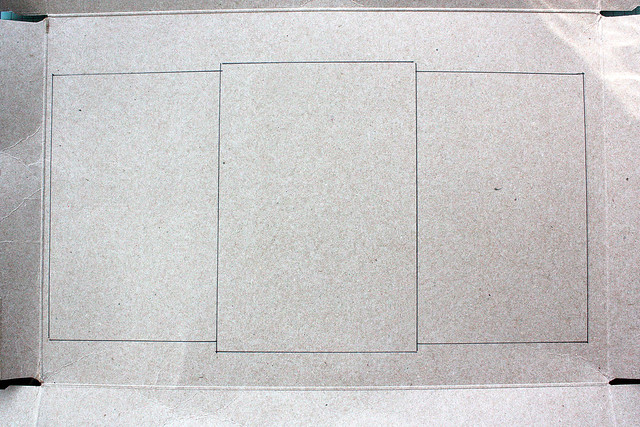
I traced them with a black pen so you can see exactly what I mean.
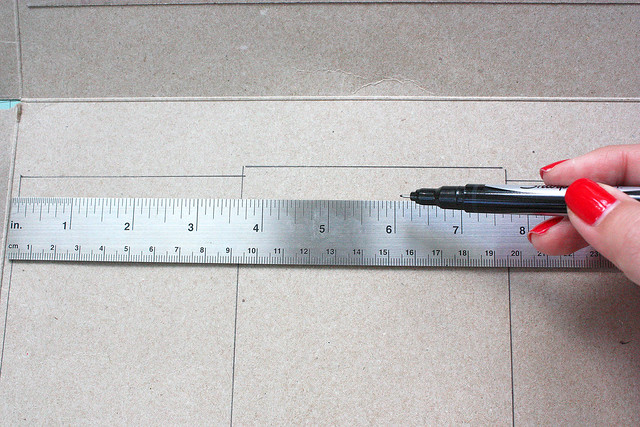 Use the ruler to draw a line across all three rectangles about a half inch (or one centimeter) below the top of the smaller rectangles. Do this on the top and bottom. Check the photo below how your rectangles should look now.
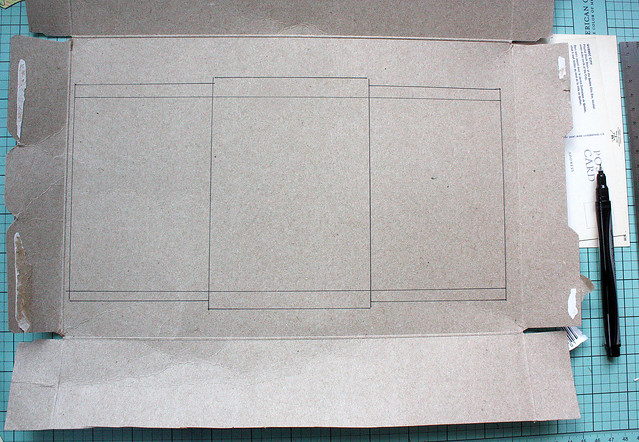 The reason for the line is to help draw the extremities of the bat and keep everything in an easily foldable and manageable size. Don't draw anything outside the newly drawn lines, except for the bats ears and feet. Those are coming up next.
 Now for some simple freehand drawing.
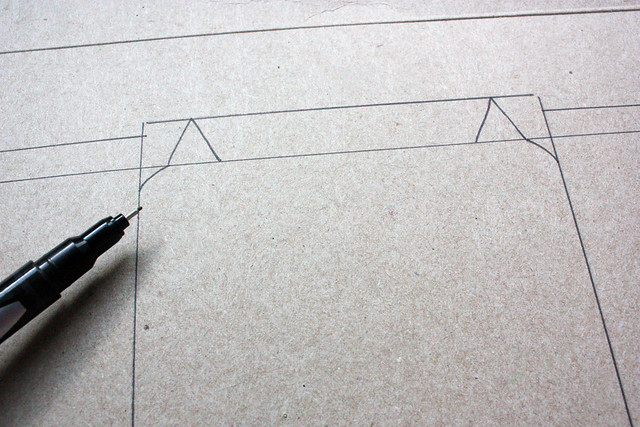 On the top of the middle rectangle, draw two pointy ears and a small dip from both ears to the side of the rectangle (this will be the bats head).
 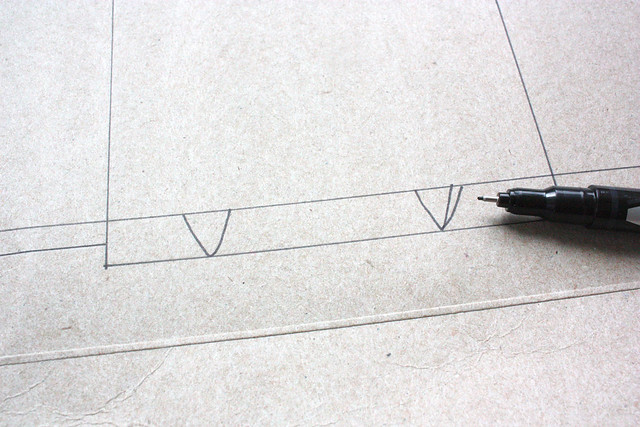 At the bottom of the middle rectangle, draw two feet. As you can see, this is not an exact science. I screwed up the first one, so I just made the foot bigger. I felt my bat needed cankles.
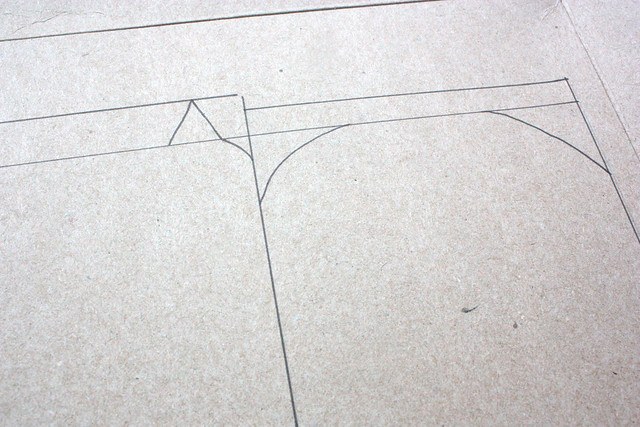 To draw the wings, round out the tops of the smaller rectangles.
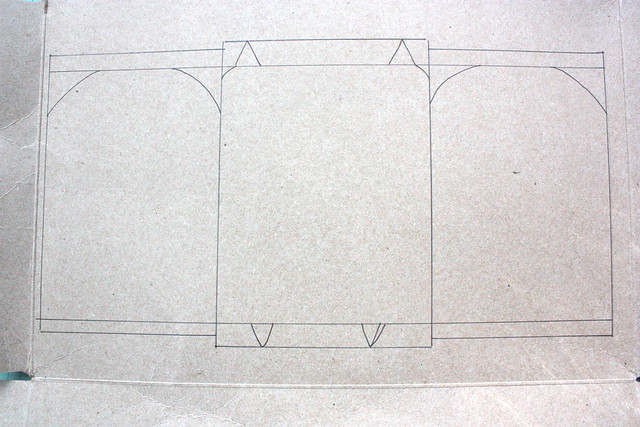 This is what your template should look like right now. If it doesn't, don't worry, just go back and adjust anything you feel like doesn't look right. Remember, this is your template, you can redraw bat-canckles until the cows come home if you feel like it and your cards will still look super-impressive!
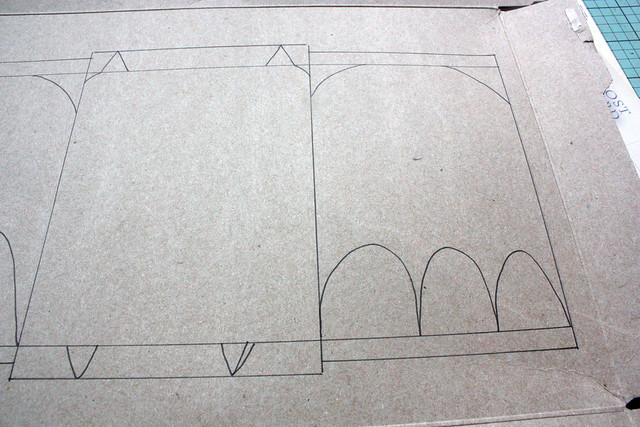 Finally, the last step of your bat-drawing adventures is at hand. Finish off the bottoms of the wings with some arches. These can be as steep or shallow as you like. I felt like making a slightly meaner looking bat with some pointier wings. Totally up to you.
Honestly, if you're not sure about this step, you can just leave the bottoms of the wings totally straight. Anyone seeing the shape will know it's a bat, no matter how pointy or flat the wings are!
(Seriously! Don't give in on the "real bats have curves" hype! Your bats are perfect the way they are!)
 And, you have a bat! Now, cut out that sucker!
(Get it? Bat? Sucker? Man, I'm so hilarious*!)
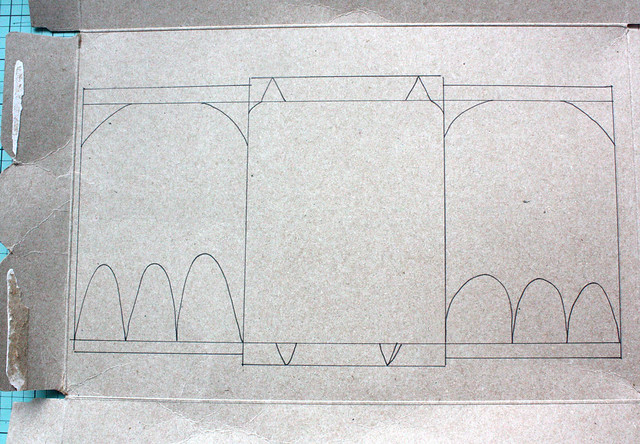
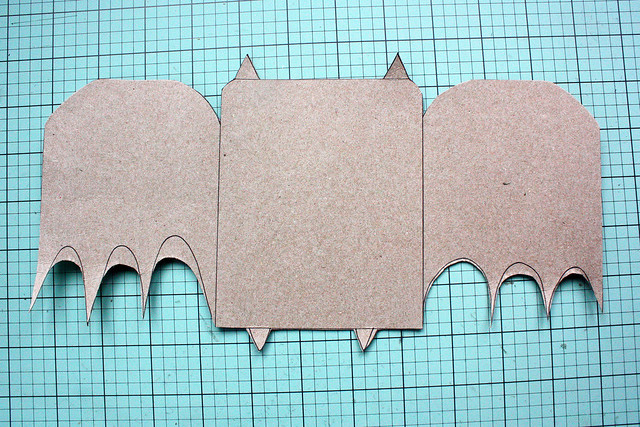 Here's your bat template! You can obviously round out some edges or fine-tune your bat still if you want. I actually quite like this guy...
Once your template is finished, it's pretty simple from this point onwards. Even the old tutorial got this part right...
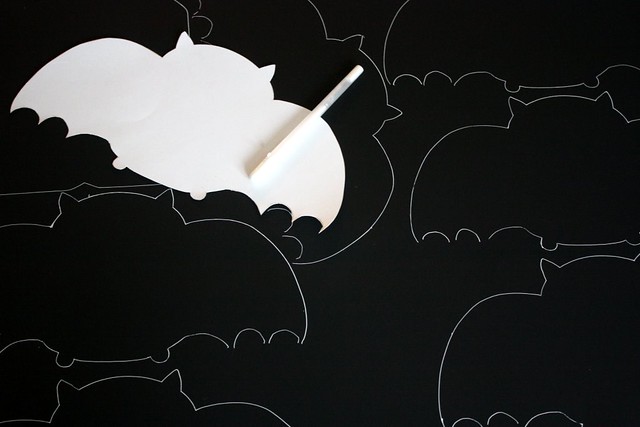 Place the template on your black paper and trace the outline of the bat. Repeat as many times as needed or as fits on your paper.
 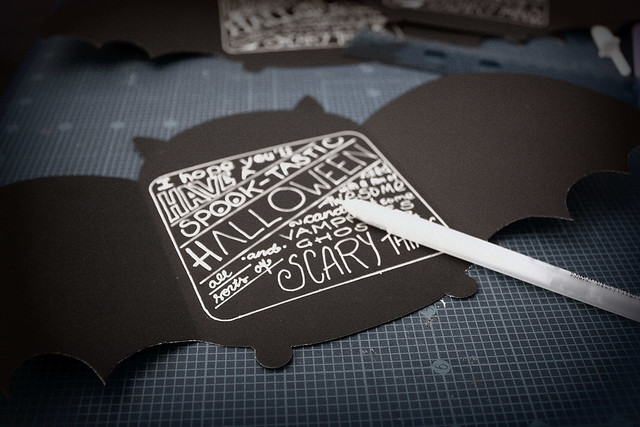 Cut out your bats and fold the wings towards the middle. Fold them along the line where the larger and smaller rectangles meet.
And you're done! Just write away!
If you make these cards, I would love to see them! Please link your versions to this post!
As always, any comments are welcome! Did you feel this tutorial is better than the old one? Would you like more photos? More great jokes? Please let me know!
*) Ok, I'm sleep-deprived
0 comments:
Post a Comment