
I have a ton of envelopes at home, many which are plain and generally quite boring. The good thing (ok, one good thing of about a billion) about running your own paper business, is that here's always plenty of exciting envelopes to use. So, the plain ones are often neglected. I hate waste, whether it's for perfectly good items or the space it takes to store them. This tutorial solves all these problems! I will definitely use these envelopes.

Aren't they awesome? They are modeled after super-classy, super-expensive stationery.
The best part about this? Cheap, easy and fast!
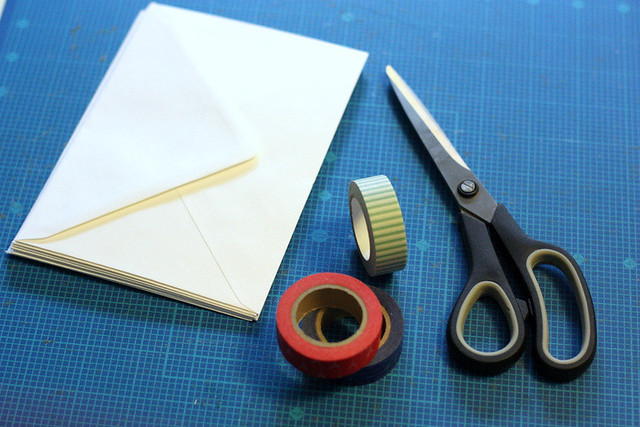
All you need to make these yourself are; envelopes (any kind will work, whatever you have lying around), washi tape and scissors.
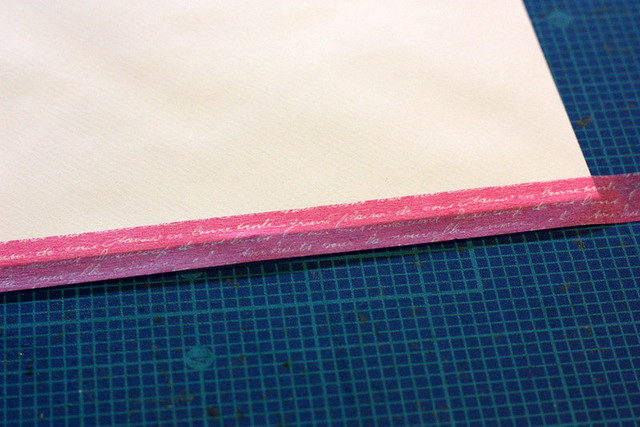
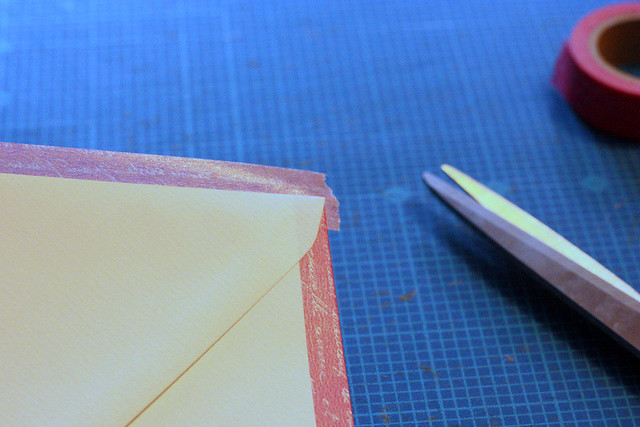
Start with the bottom of the envelope. Place a strip of washi tape so that half of it is attached to the envelope and the other half overhangs.
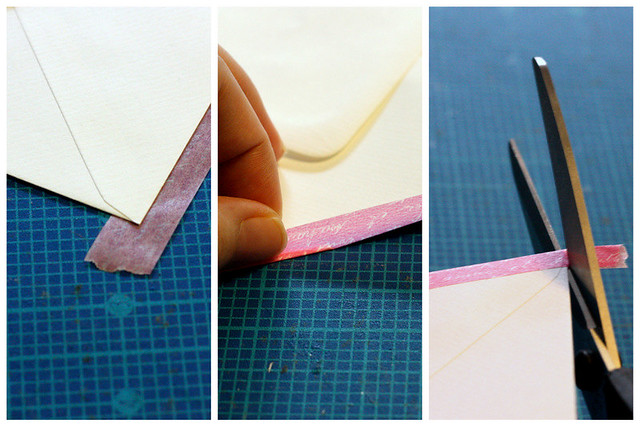 Don't worry about the excess tape at the ends. Turn the envelope over and fold the excess on the other side. Trim the excess tape from the ends.
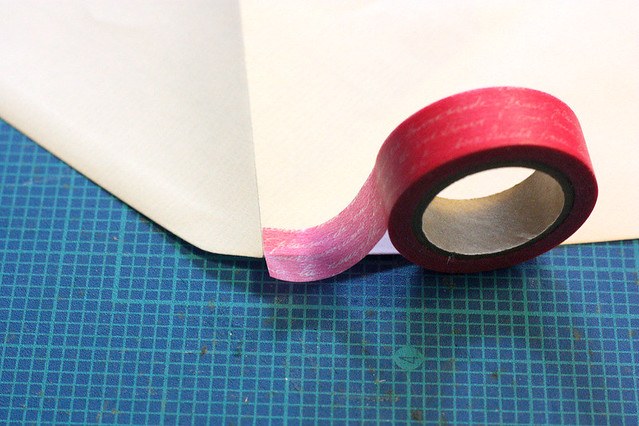
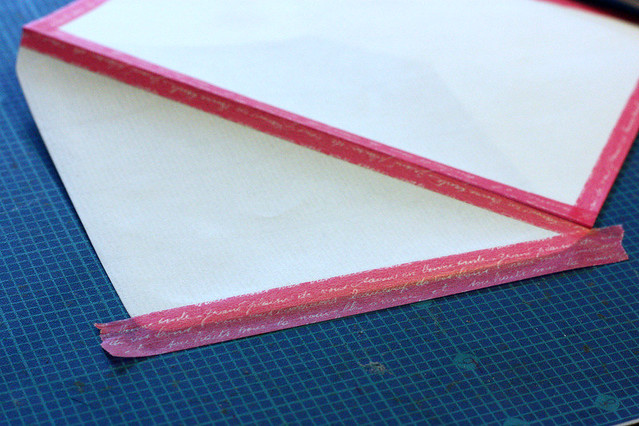
Repeat the same process on the shorter sides of the envelope. One trick I found made it easier for me, is to cut the end of the tape straight before taping the top of the short sides. You'll get to the backside of the envelope soon, so just start from the top of the envelope for now.
When you get to the top of the envelope, I trimmed the excess tape form the ends before folding it over. Again, I find it a bit easier that way, but it's up to you.
Now you have all four sides taped and it's time to finish the back. Open the flap of the envelope and start taping one side the same way you did the others.
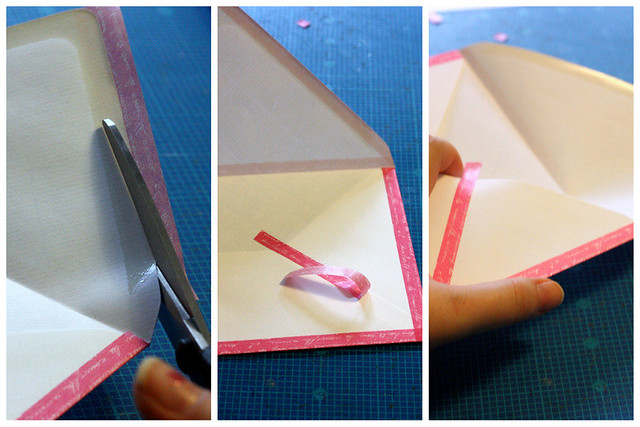
Instead of folding the tape over to the other side, cut it along the flap. If you fold it over, you'll cover the adhesive surface, and you wouldn't want that. Now, take the long strip of tape you cut off from the flap and place it along the edge of the lower flap of the envelope (the one that's glued on to the sides to keep it together). Finally, trim off the excess tape from the ends.
And you're done! It's really simple to make and very quick. I had to try out different color combinations and will, for sure, make more.
Please let me know if you're going to try this out! I would love to see what you've made!
Love it! Not only it's super easy and of a great impact, but they also look like computer icons, and for a computer nerd like me, it's even more awesome :D Thanks for sharing Katri! xx
ReplyDeleteYou know, you're absolutely right! I didn't even think about how they look like icons! No wonder I loved them so much :D
DeleteI'm happy you liked it Fab!
such a cute and simple way to ass a special touch!
ReplyDeleteThank you! Glad to hear you like it. I just love washi tape and try to come up with new ways to use it all the time.
DeleteLovely envelopes... where do you buy your washi tape?
ReplyDeleteThank you! They are super fun to make too!
DeleteSo far I've bought my washi tapes from two places here in Montreal; Deserres, which is a chain of craft stores and I also found some from Renaud-Bray, a book store. Their selections are really limited, so I'm looking into finding a good place to buy them elsewhere, probably online.
So beatiful envelopes!!
ReplyDeleteThank you! I'm so happy how they turned out!
DeleteThese are so cute, simple and very creative! I came across them on Bloglovin. Cheers from a fellow Canuck!
ReplyDeleteThank you, glad you like them! I'm happy you dropped by!
DeleteUpea idea! Minä tein ensikokeiluni sopimaan itse tehtyyn korttiin.
ReplyDeletehttps://maakariakka.wordpress.com/2013/02/14/pskarteluhaaste-175-maskaus/
Kiitos, kiva kun tykkasit! Kaynkin heti vilkaisemassa sinun version. (Ihana nimi muuten!)
DeleteLove It! I created some using some deco tape that I got in the $1 section of a local store. Makes them super cheap and SUPER CUTE!
ReplyDeleteThanks Julie! I'm so happy to hear you liked it. I try to buy my tapes on sale as well. Sounds like you've found some pretty awesome deals there, I'm looking forward to the day that I might find $1 deco tape...
DeleteI love it!
ReplyDeleteAnybody knows if I can I mail envelopes with washi tape around?
Thanks in advance
Thanks, glad to hear you like it!
DeleteDo you mean envelopes with washi tape on the outside or rolls of it on the inside? Well, either way, I think the answer is yes. I mail envelopes decorated with washi tape all the time. And if you want to mail a roll of tape, just check what the limitations for thickness of the envelope is. I've learned the hard way to check that...
Great job on the tutorial, Katri! I tried it and I love it. What a simple way to give life to boring envelopes :)
ReplyDeleteHere are my results:
http://paperpastries.blogspot.com/2013/08/im-pinterested.html
Place a strip of washi tape so that half of it is attached to the envelope and the other half overhangs. denver heating and cooling
ReplyDeleteThis is impressive and also great information. I personally liked going through your solid points on this topic. Many thanks for creating such excellent material. This is excellent. reflective tape saves
ReplyDelete